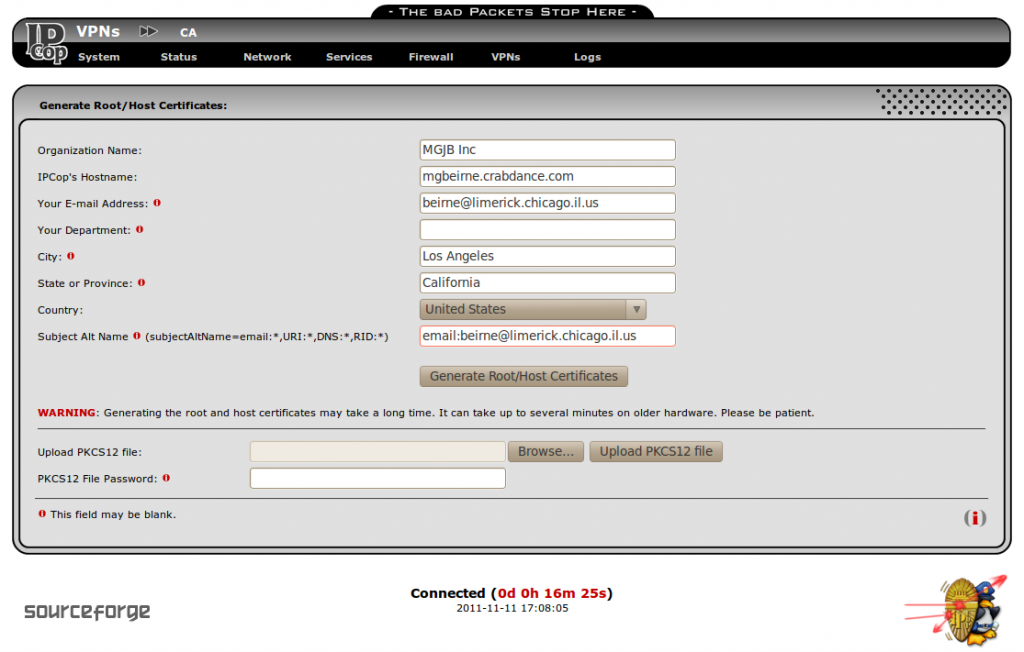
To configure an IPSec tunnel on IPCop, log in to the web interface and click on VPNs->CA. Then click on “generate root/host certificates” You should see the following screen:

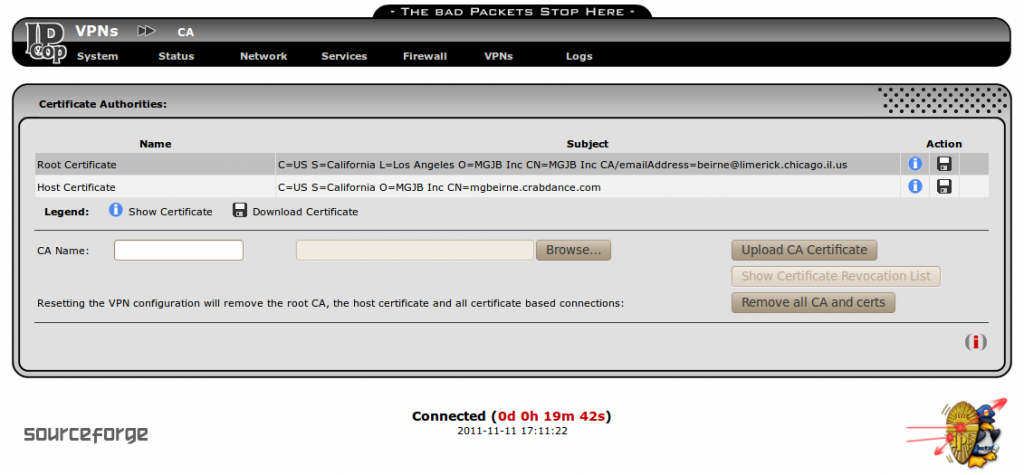
Do not use anything other than alpha-numeric characters, the “@” and the “.” in this form or you will get an error. Notice that the “Subject Alt Name” field is filled in with “email:beirne@limerick.chicago.il.us”, which is the same as the E-mail address field. This will be used as the local and remote IDs for the VPNs to use. I tried using the longer DER_ASN1_DN, which is actually the “subject” field of each certificate, but IPCop wouldn’t let me specify them and the other remote IDs of IP address and Fully Qualified Domain Name would not work with NAT-traversal. When you put an email address in the “subjectAltName” field of a certificate, it must be used as the ID for any connection using that certificate. You only need to create the root CA and host certificate once. After you have filled in the fields and clicked “Generate Root/Host Certificates” you should get the following page:

Now you can download these certificates to a USB flash drive or to your computer by clicking on the floppy icons above. Rename the files to something related to the IPCop host that they came from, so as not to confuse them with the cacert.pem or hostcert.pem from a different IPCop server. I used crabdance2cacert.pem and crabdance2hostcert.pem.
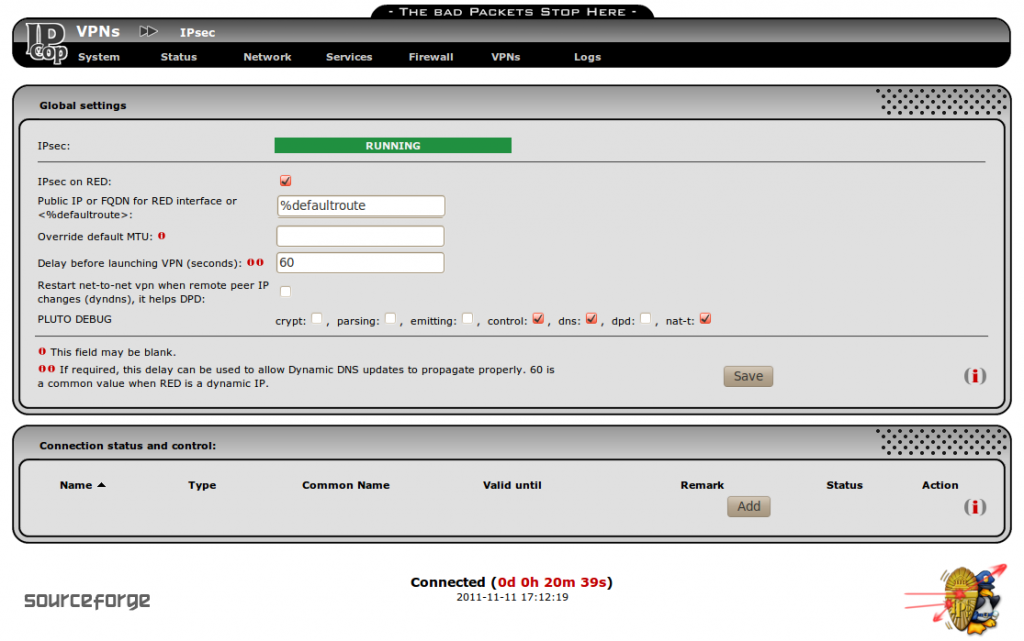
Now click on VPNs->IPsec and you should see something similar to the following screen. Yours should have a red banner saying “STOPPED” instead of “RUNNING” and all “PLUTO DEBUG” options should be turned off. The Pluto Debug options are only necessary to increase the verbosity of the log files generated in order to resolve problems and should be turned off after all connections are working. They will fill up a filesystem if left on for a few days too.
Since I have a DHCP assigned address, my IP address may change, but %defaultroute will always use the Internet connection default route. Check the box for “IPsec on RED” and click “Save” and then “Add”.
Then you should see the following screen:

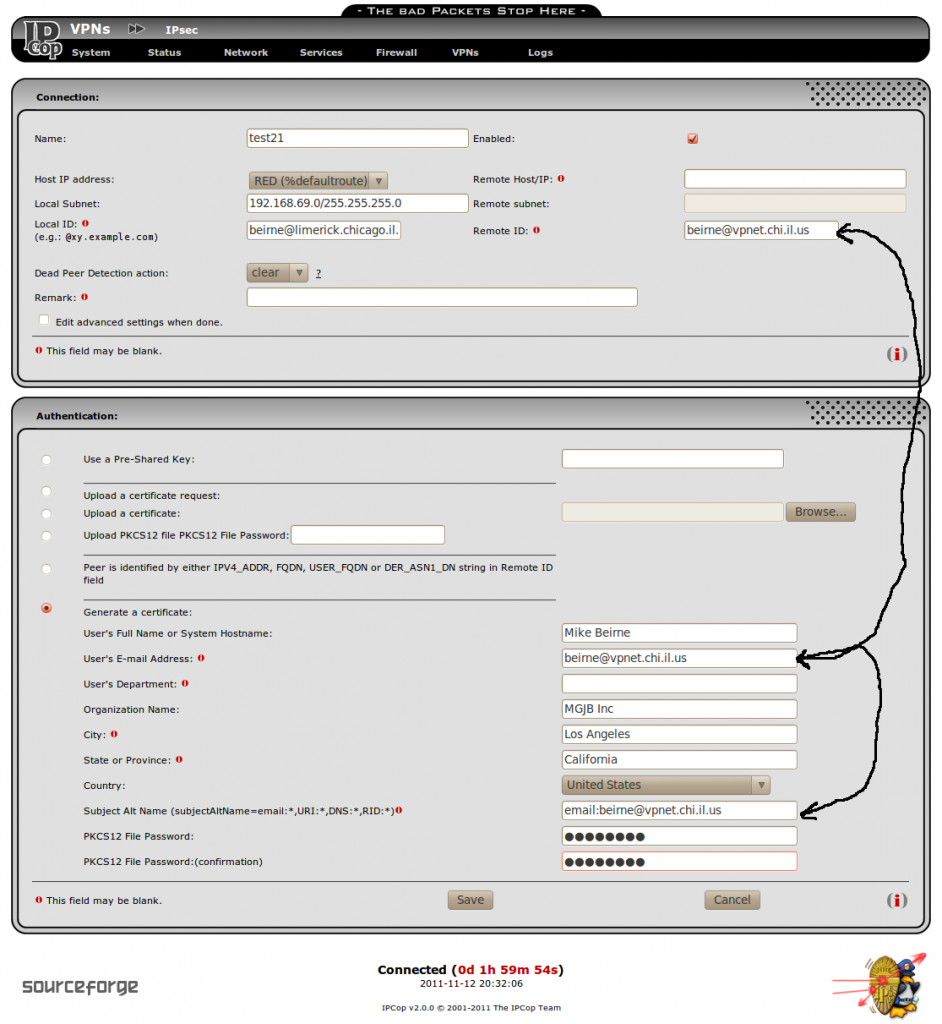
Choose Host-to-Net for road warrior connections or Net-to-Net for connections with another IPCop box or other IPSec host. Then click on “Add”. You should then see the following screen except with blank fields.

Give the connection a name without using any space characters. Use the email address that you put into the Root/Host certificate subjectAltName field for the “Local ID” field. And use the email address of the person getting the road warrior connection for the “Remote ID”, “User’s E-mail Address” and also put it after “email:” in the subjectAltName field. Leave the “Remote Host/IP:” field empty for road warrior connections or put in the remote host name or IP address for net-to-net. The remote subnet field is greyed out for road warrior connections, but should be filled in with the remote subnet for net-to-net connections. You will have to give the PKCS12 file password to the person getting the connection too. You should not have to change any of the “Advanced” settings.
After you click “Save”, you should see the following screen:
Click on the floppy icon to download the pkcs12 certificate to your USB drive or to your computer. You should have three files now, a cacert.pem, a hostcert.pem and a <connection name>.p12. IPCop is now waiting for the remote side to initiate the connection.


